Showing posts with label Projects. Show all posts

Monday, March 12, 2012

How does she do it?

So everyone seemed to love the Flat Iron Case and Cosmetic Bag Christmas Gifts.

Since then I've even had requests for more! So I thought I'd post some photos of what I did, so that I don't forget if I need to make them again!

This one was for my momma.

Supplies are pretty simple. Fabric, lining, rotary cutter, thread, and fabric. 
And my machine of course.

Flat Iron Case
Lay the fabric right sides together on top of the lining. I think I used pieces that were 17" x 15", but it would totally depend on the size of your curling iron/flat iron. 

I pinned it all the way around. And then you sew it together, leaving an opening large enough to flip it inside out. 
 Trim the edges so it's nice and smooth. 

Fold the bottom third up and pin it in place. Sew from the base of one fold all the way around to the next. 

 At this point, I added the ribbon and sew over that so it's attached. 

And there you go. You have a flat iron case with a ribbon to tie it. 

It's the perfect size for my curling iron. 

I can put it in while it's still hot. 

And fold it up so it's ready to go. 

Useful and adorable. 

The matching Cosmetic Bag
Start with fabric and fusible lining (to make it a little bit more stiff)

Iron the lining to the fabric.

Sew the right sides together with the zipper inside. Do the same thing to the other side of the zipper. 

Sew from one end of the zipper to the other. 

Trim and finish the edges. I used a zigzag stitch since I don't own a serger...yet. 

Turn it inside out and there you have it. A flat iron case and matching cosmetic bag. 

That all your friends are sure to love. 

This is the fabric I got for B...I hope she likes it...

Friday, January 27, 2012

A look ahead...or back

Whoa, it's been over a month since my last post. Does that mean I've given up being domestic? No way, not that easily.

I've got quite a few things to share. But first, I'll tell you about my new to do list system.

So, I love all things to do lists. I don't know if it's because I love the satisfaction of being able to cross things off and feel accomplished or if I get overwhelmed with too many things unless I spell it out or if I just really enjoy making to do lists. Either way, I LOVE them.

But there gets to be a point when you spend so much time making to do lists that you don't actually get anything done. Which is rather counterproductive. So I've simplified my life by creating 2 types of lists. The long to do list and the short list. The long list is a bunch of things I want to/need to do. Whether it is an arts and crafts project from pinterest or a blog or hemming pants or planning meals or grocery shopping or cooking or running or laundry or emptying the dishwasher (yep, that made the list...) I just put them all on one long list. I'm not interested in checking things off that list just yet, it is just to help me remember things that I want to do.

But every morning (sometimes the night before, sometimes not until my metro ride to work) I create a daily to do list. 3 things. That's it. Just 3 things I want to complete (usually after work, sometimes at lunch) that day. I start with things that need to get done or that are already in my calendar (Running, dinner with friends, Bible Study) and then add smaller projects (baking cookies for work, one craft project, hemming pants).

So far (This system has been in place for about 4 days) it's worked great. Don't believe me? Here's a list of what I did this week.

Monday
  1. Dinner with Taylor (I brought leftover Curried Chicken and Brown Rice)
  2. Bible Study
  3. Pick Laura up from the Airport
Tuesday
  1. Run 2-4 miles (Part of the new training program I just started for the Cherry Blossom 10 miler. I went 3.5)
  2. Intern Bible Study
  3. Empty dishwasher (I usually don't have to add things like this, but it had been 3 days!)
  4. Add songs to iPhone and iPod nano (so I can finally use it on my runs)
  5. I  also tried a BUNCH of new hairstyles and found some I really like...
Wednesday
  1. Run 3-5 miles - Intervals (I went 4.5 and nearly DIED)
  2. Grocery Shopping (which then led to a complete overhall and reorganization of everything in my cupboard when I discovered MULTIPLES of different things, like 3 bottles of BBQ sauce...who needs 3 bottles?!? Not me. And never again with  my new system I'll explain in a later post.)
  3. Make Nutella No Bake Cookies (oh my goodness, if you haven't tried these, then you NEED TO)
  4. Cut up fruit and veggies for snacks (Strawberries, Pineapple, Celery)
Thursday
  1. Run 2-4 miles (3.5 and it was easier than day 1. But I'm glad tomorrow is a rest day)
  2. Cook dinner (Pan Girlled Ginger-Honey Pork Tenderloin and Roasted Green Beans with Parmesan - which makes my subscription to Cooking Light SO worth it)
  3.  Bake Chai Tea Gingerbread Bars (Ok, so this wasn't on my list, but I ended up doing it anyways)
  4. Hem Pants (well, I got one of 2 pairs hemmed)
  5. Cut up Jicama (I LOVE IT)
  6. Paint nails (this wasn't on my daily list, but I was in such a productive move I decided to do it anyways)
Friday
  1. Dinner with Friends
  2. Arcadia (my favorite play!)
  3. Update Blogs
So, as evidenced by this past week, I have CLEARLY been productive (including sewing, cooking, baking, and planning). And I have felt more energized at work. It might just be better planning meals and snacks, working out, and sleeping. But I also think its not having the stress of thinking about everything I have to do, because there are only 3 things. And that is TOTALLY manageable.

So for now I leave you with a few images of what you have to look forward to in the posts ahead...


Wednesday, December 21, 2011

Sugar Scrub

I think I have project ADD.

Seriously.

I move from sewing to Mod Podge to scrapbooking to whatever else I find quickly.

Sometimes I finish, but most often, I don't.

Needless to say, I've found something else I want to try....I'm going to try to make my own scented Homemade Sugar Scrub.

What was I thinking?
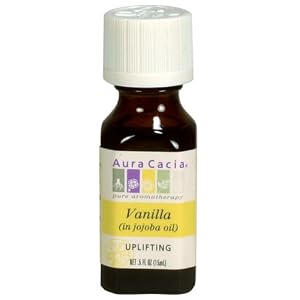
I'm serious. I even bought ($22) Vanilla scented essential oils from Whole Foods during my lunch break.

If that's not commitment, I don't know what is.

No idea what else I will use the essential oils for but, I have a feeling a lot of my friends will be getting Homemade Sugar Scrub for upcoming birthdays.

The best part? I can use Mod Podge to put a label on a jar to give to people!

So it's not really a new project, well, sorta.

I currently have 4 different things I'm planning on doing with Mod Podge....

I think I'm just waiting for the sample pack I ordered so I can use the fabric kind.

Anyways, that's the plan. I'm bringing the oils home with me so I can try it there, I'll let you know how it goes...

Thursday, December 8, 2011

Mod Podge, my newest obsession

So as you can tell, I've been on a project tear recently.

Maybe it's because I've discovered Mod Podge or maybe it's the holiday season. Whatever it is, I am loving my google reader that is filled with GREAT project ideas. Ideas I would love to try, but hardly ever do.

Until now.

I discovered how you can take an empty lotion/shampoo/body wash bottle and Mod Podge and Fabric to make something GREAT.

+
 =
I  know what you are thinking. What is that thing? Well, it's a Cell Phone holder to use while my phone is charging. A lot of times the cords get all tangled or the phone hangs by it's own cord, which is so bad for it, so now, I have some place to keep my phone while it's charging so I don't have to worry about where it is. I can also take it with my while I'm traveling so I have some place for my phone to charge at hotels.

Honestly, I'm not sure how useful it will be in the end. But I already had the bottle and the fabric and have been wanting to figure out things to do with Mod Podge, so I think this was a great first project.

I love it.

I'll always be from Minnesota

You can take the girl out of Minnesota, but you can't take Minnesota out of the girl.

How true that is for me. (It's one of the reasons I want a tattoo in the shape of Minnesota's outline, sad, but so true.)

So when I discovered an Etsy shop that sold pillows in the shape of states, I feel in love, with the idea that is, not the price. No way I am paying $50 for something I can do myself. So I decided to give it a try. Minnesota has a pretty unique shape (although I feel like people don't recognize it when I show them, unless they are from the great state themselves).

I thought, if this works, it would be a great gift for K. I could make one in the shape of Missouri and one in the shape of South America for T (Chile is just too skinny to make by itself...) as a wedding present.

Anyways, it was a super easy project. I printed out an outline and enlarged it to fit on 2 pieces of 8.5" x 14" paper, cut it out and taped it together. I used some black fabric I already had (I plan on using sweatshirt material for K's).
Once I had 2 pieces cut out, I sewed almost all the way around it and stuffed it before I hand stitched the bottom closed. I need to work on making rounded corners with the sewing machine, but I think it was a success.

I think it's a perfect size! I cannot wait to make more of these. Missouri should be pretty easy (I hope) and South America will be a little tricky but I have 2 weeks to finish it.

Thursday, November 17, 2011

Sweater Pillow

So our couch has been pillowless for over a year. I bought a bunch of fabric and pillows, made 1 purple pillow (was trying a ruched technique that failed-epically) and the rest are sitting on our couch their boring white selves.

So when I came across this tutorial in a blog, I knew I just had to try it. I mean, who doesn't love the idea of a sweater pillow? ESPECIALLY in winter. The only problem is that the cover isn't removable, so the pillows would be permanently sweater themed.

I kind of think I'm ok with that-although it might make washing them a little bit difficult. But hey, I have a bunch of extra sweaters, so I might as well try, and if it's a complete failure, well... I highly doubt anything could fail more than my Martha Stewartesque attempt at "textured" pillows. She makes it seem so easy -it's not.

And this is great, because the sweater already has built in texture! I bet I could even use an ARGYLE sweater. Oh my goodness, I just got a whole lot more excited about this project!
I'll let you know how it goes!

Happy sewing!